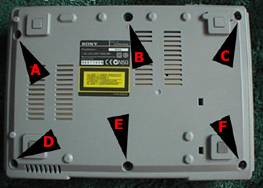
Turn unit over and remove the 6 screws. (Some units have 5 screws) Turn unit right-side up, and lift off the cover.
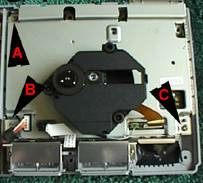
Gently remove the wires coming from the laser unit.
Make sure to hold the ribbon cable right where it goes into the connector. The ribbon comes out of the connector, the connector is NOT part of the ribbon cable, so do not pull on the connector as you can break it off the board.
Just lift up the laser unit and put it aside.
Remove the ribbon cable coming from the gamepad connectors, again do not pull on the connector, the ribbon comes out of the connector,
Remove the cable coming from the power supply, it just lifts up and out of the connector on the board.
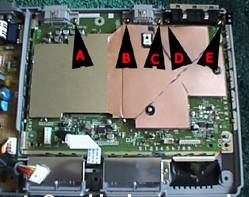
Remove the screws holding the bracket in place. Lift off the bracket, it may be snug, try lifting it at the back first and then popping it off.
Remove the screws along the top edge. The circuit board can now be lifted up and turned over (only required for some installations.)